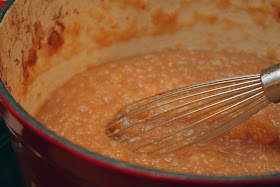
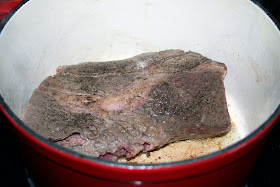
Brad loves shredded beef sandwiches and whines that I can't make then as well as his grandma. This is due (at least partially) to my irrational fear of crock pot cooking. Long days at work plus a crock pot with a faulty thermostat plus meat without much fat plus not enough cooking liquid has led to many burned dinners and impromptu nights out. That, however, is another story.
I tried this beef recipe in hopes of making Brad smile. He didn't say it was better than his grandma's (or even as good as his grandma's), but he did eat two sandwiches.
I served it with Ree Drummond's Fancy Macaroni - which I was simply looking for an excuse to make. And, I baked the macaroni and cheese in my new Le Creuset Mini Cocotte's.
Shredded Beef Barbecue
12 servings
Taken from: Taste of Home
Prep time: 10 minutes
Cook time: 8 - 10 hours (slow cooker)
1 beef sirloin tip roast (2-1/2 pounds)
1/2 teaspoon salt
1/4 teaspoon pepper
1 tablespoon canola oil
1 cup each ketchup and water
1/2 cup chopped onion
1/3 cup packed brown sugar
3 tablespoons Worcestershire sauce
2 tablespoons lemon juice
2 tablespoons cider vinegar
2 tablespoons Dijon mustard
2 teaspoons celery seed
2 teaspoons chili powder
12 kaiser rolls, split
Sprinkle roast with salt and pepper. In a nonstick skillet, brown roast in oil on all sides over medium-high heat; drain.
Transfer roast to a 5-qt. slow cooker. Combine the ketchup, water, onion, brown sugar, Worcestershire sauce, lemon juice, vinegar, mustard, celery seed and chili powder; pour over roast.
Cover and cook on low for 8-10 hours or until meat is tender. Remove meat; shred with two forks and return to slow cooker. Spoon 1/2 cup meat mixture onto each roll.
One sandwich equals 313 calories, 9 g fat (2 g saturated fat), 2 g fiber
My review: The sanwiches were fine. The meat wasn't fatty (one of my frequent complaints about shredded meat sandwiches), and it was flavorful (no extra BBQ sauce required).
Fancy Macaroni
6 servings
Taken from Pioneer Woman
Prep time: 20 minutes
Cook time: 15 minutes
2 C Macaroni
4 Tbsp Butter
1 whole Medium Onion, Cut In Half And Sliced Thin
5 slices Regular Bacon
1/2 Tbsp Bacon Grease (reserved From Bacon Slices)
1/8 C All-purpose Flour
1 C Whole Or 2% Milk
1/4 C Half & Half
1 whole Egg Yolk, Beaten
Salt and Pepper, to taste
1/4 C Grated Gruyere Cheese
1/4 C Grated Fontina Cheese
1/4 C Grated Parmigiano Reggiano Cheese
2 oz, weight Chevre (soft Goat Cheese)
Preheat oven to 350 degrees.
Cook macaroni for half the time of the package instructions. Drain and set aside.
Fry bacon until slightly, but not overly, crispy. Drain on a paper towel. Reserve grease.
Melt 2 tablespoons butter in a skillet and saute onions over medium-low heat for 10 to 12 minutes, or until golden brown and soft. Set aside.
In a pot, melt 2 tablespoons butter. Sprinkle in flour and whisk to combine. Cook, stirring constantly, over medium heat for 1 minute. Pour in milk and half & half, then cook for 3 to 5 minutes or until thick. Reduce heat to low. Add salt & pepper to taste.
Beat egg yolks and drizzle 1/8 cup hot mixture into the yolks, stirring constantly. Stir to combine. Pour egg mixture into sauce and cook for another minute.
Add cheeses and stir until melted. Add onions and bacon and bacon grease and stir. Taste for seasonings and add more salt if needed. Add cooked macaroni and stir to coat.
Pour into a baking dish and bake for 15 to 20 minutes or until sizzling and hot.
My review: This was labor- and dish-intensive. I bought and shredded way too much cheese (the left-overs were frozen). The bacon, butter, and cheese led to a dish that was plenty salty; I didn't add any additional salt. Also, I'm not a huge onion lover. Next time I will cut the onions at least in half. And, I'm not sure that I'd bake it in small dishes again. It was a little dried out. And, I don't know that I'd use the full amount of noodles the next time, either. How's that for a rambling review?
Wednesday, December 30, 2009
Tuesday, December 22, 2009
Week 16: Pork Tenderloin and Applesauce
I love watching Food Network. I recently saw Ina Garten make this applesauce and decided it was just what we needed for dinner, with a pork tenderloin to go with it.
Appplesauce
from Ina Garten for Foodnetwork
Prep time 20 minutes
Cook time 1 hour
Makes 2 1/2 quarters
2 large oranges, zested and juiced
1 lemon, zested and juiced
3 lb Granny Smith apples (about 6 to 8 apples)
3 lb sweet red apples (McIntosh) (about 6 to 8 apples)
1/2 C light brown sugar, packed
4 Tbsp unsalted butter
2 tsp ground cinnamon
1/2 tsp ground allspice
1. Preheat the oven to 400 degrees F.
2. Place the zest and juice of the oranges and lemon in a large bowl. Peel, quarter, and core the apples (reserving the peel of 2 of the red apples) and toss them in the juice. Pour the apples, reserved apple peel, and juice into a Dutch oven or enameled iron pot.
3. Add the brown sugar, butter, cinnamon, and allspice and cover the pot.
4. Bake for 1 hour, or until all the apples are soft.
5. Remove and discard the red apple peel. Mix with a whisk until smooth, and serve warm or at room temperature.
The process made the house spell absolutely delish. And, the applesauce had a really great texture. The final product, though, was really, really, really tart - like make a sour-face at the dinner table tart. Next time I would use less orange and lemon juice and zest and more sugar.
Herb-Marinated Pork Tenderloin
from Ina Garten for Food Network
Prep time 15 minutes
Marinates for a minimum of 3 hours
Cook time 15 minutes
1 lemon, zest grated
3/4 C freshly squeezed lemon juice (4 to 6 lemons)
1/2 C olive oil
2 tablespoons minced garlic (6 cloves)
1 1/2 tsp dried rosemary
1 tsp dried thyme leaves
2 tsp Dijon mustard
Salt
3 pork tenderloins (about 1 pound each)
Freshly ground black pepper
1. Combine the lemon zest, lemon juice, 1/2 cup olive oil, garlic, rosemary, thyme, mustard, and 2 teaspoons salt in a sturdy 1-gallon resealable plastic bag.
2. Add the pork tenderloins and turn to coat with the marinade. Squeeze out the air and seal the bag. Marinate the pork in the refrigerator for at least 3 hours but preferably overnight.
3. Preheat the oven to 400 degrees F.
4. Remove the tenderloins from the marinade and discard the marinade but leave the herbs that cling to the meat. Sprinkle the tenderloins generously with salt and pepper. Heat 3 tablespoons olive oil in a large oven-proof saute pan over medium-high heat.
5. Sear the pork tenderloins on all sides until golden brown. Place the saute pan in the oven and roast the tenderloins for 10 to 15 minutes or until the meat registers 137 degrees F at the thickest part.
6. Transfer the tenderloins to a platter and cover tightly with aluminum foil. Allow to rest for 10 minutes. Carve in 1/2-inch-thick diagonal slices. The thickest part of the tenderloin will be quite pink (it's just fine!) and the thinnest part will be well done. Season with salt and pepper and serve warm, or at room temperature with the juices that collect in the platter.
I only used one pork tenderloin (about 1 pound) and marinated for less than 30 minutes with the entire marinade recipe. The flavor was great.
Once again, though, the meat thermometer did me wrong - most of the pork was cooked perfectly, but one end of it was still completely raw. So strange! We will definitely use this marinade again, though.
Tuesday, December 15, 2009
Week 15: Stracotto with EVOO Garlic Mashed Potatoes
Meat and me - we don't have a real great history, especially roasts and me.
I've tried making roasts in the crock pot. I always anticipate that such a choice will result in a house that smells great, and a roast that flakes apart and tastes fabulous (with very little effort).
In reality, what happens is that the meat gets completely burned, all liquid cooks out of the crock pot, the meat ends up in the trash, and we go to Applebee's (or some other ridiculous restaurant) in place of eating the roast.
(I've even tried buying and returning and returning and returning several different crock pots thinking that the problem must, in fact, be with the crock pot and not with my cooking methods.)
Then, there was the lamb incident. Even using the oven and a brand-new meat thermometer couldn't fix my relationship with meat.
Alas, I refused to let the meat defeat me and decided to try (yet again!) to make a roast. And, this time I was victorious, and Brad was happy.
Stracotto (Italian-style Pot Roast)
Serves 6 to 8
from Cook's Illustrated: Italian Favorites (p. 36)
1 boneless chuck roast (about 3 1/2 pounds)
Salt and ground black pepper
2 Tbsp vegetable oil
1 medium onion, chopped medium
2 small carrots, peeled and chopped medium
2 small celery ribs, chopped medium
10 oz white mushrooms, cleaned and quartered
2 medium garlic gloves, minced (about 2 tsp)
2 tsp sugar
1/2 C low-sodium chicken broth
1/2 C low-sodium beef broth
1/2 dry white wine
1 (14.5 oz) can diced tomatoes
1 tsp dried thyme
1 - 1 1/2 C water (varies)
1 tsp dried rosemary
1. Adjust oven rack to middle position and heat oven to 300 degrees. Thoroughly pat roast dry with paper towels; sprinkle generously with salt and pepper.
2. Heat oil in large heatproof Dutch oven over medium-high heat until shimmering but not smoking. Brown roast thoroughly on all sides, reducing heat if fat begins to smoke, 8 to 10 minutes. Transfer roast to large plate; set aside.
3. Reduce heat to medium, add onion, carrot, celery, and mushroom to pot, and cook, stirring occasionally, until vegetables begin to brown, 6 to 8 minutes. Add garlic and sugar and cook until fragrant, about 30 seconds.
4. Add chicken and beef broths, wine, tomatoes and juice, and thyme, scraping bottom of pan with wooden spoon to loosen browned bits. Return roast and any accumulated juices to pot. Add enough water to come halfway up sides of roast. Bring liquid to a simmer over medium heat, then place large piece of foil over pot and cover tightly with lid. Transfer pot to oven. Cook, turning roast every 30 minutes, until fully tender and meat fork or sharp knife easily slips in and out, 3 1/2 to 4 hours.
5. Transfer roast to carving board and tent with foil to keep warm. Allow liquid in pot to settle for about 5 minutes, then use wide spoon to skim fat off surface. Add rosemary and boil over high heat until reduced to about 1 1/2 C, about 8 minutes. Season to taste with salt and pepper.
6. Carve meat into 1/2-inch-thick slices or pull it apart into large pieces. Transfer meat to warmed serving platter and pour sauce and vegetables over it. Serve immediately.
This was totally delicious. I used a chuck roast that was a little more than 2 pounds. It still took almost 3 hours to cook. I was worried the whole time that I was over-cooking it, but it was really clear when it was cooked enough. Also, checking it every 30 minutes was a great way to be sure I didn't over-cook. I do have to say, though, that turning the roast every 30 minutes really interfered with my Sunday-afternoon napping schedule!
Also, the chuck roast I bought wasn't tied, and I didn't tie it. The recipe made a big deal out of tying the meat, but I didn't have any baker's twine and didn't want a Bridget Jones-esque blue string incident.
We will make this again - maybe even for company. It was that good!
Garlic and Olive Oil Mashed Potatoes
Serves 6
from Cook's Illustrated: Italian Favorites (p. 39)
2 lb russet potatoes, unpeeled and scrubbed
5 medium garlic cloves, peeled
2 tsp + 1/8 tsp salt
1/2 C + 2 Tbsp extra-virgin olive oil
1/2 tsp ground black pepper
2 tsp juice from 1 lemon
1. Place potatoes in large saucepan with water to cover by 1 inch. Bring to boil over high heat; reduce heat to medium-low and cook at bare simmer until just tender, 40 to 45 minutes.
2. While potatoes are simmering, mince 1 garlic clove. Place minced garlic on cutting board and sprinkle with 1/8 tsp salt. Using flat side of chef's knife, drag garlic and salt back and forth across cutting board in small circular motions until garlic is ground into smooth paste. Transfer to medium bowl and set aside.
3. Mince remaining 4 cloves garlic. Place garlic in small saucepan with 1/4 C olive oil and cook over low heat, stirring constantly, until garlic foams and is soft, fragrant, and golden, 5 minutes. Transfer oil and garlic to bowl with raw garlic paste.
4. Drain cooked potatoes. Using paring knife, peel skins from potatoes; quarter.
5. Add remaining salt, pepper, lemon juice, and remaining 2 Tbsp uncooked olive oil to bowl with garlic and cooked oil and whisk to combine.
6. Fold mixture into potatoes. Blend together using an electric mixer on a slow speed.
A few things about this recipe. . . I was nervous about the amount of garlic, but the end result was really great (not anything that would scare vampires, as I originally thought). And, I've also saved you from a fatal typo in the original recipe. The recipe lists 2 Tbsp olive oil in one place and 6 Tbsp olive oil in another place. I used 6 Tbsp. It was way too much olive oil.
The verdict. . . the potatoes were a great mate for the roast. I think they'd also taste great with chicken marsala. We will make them again.
Saturday, December 5, 2009
Week 14: Lasagna with Turkey Sausage
My very first lasagna was made from the recipe on the noodle box. I remember the day when I grabbed a box from the grocery store shelf and actually gasped when I found that the recipe wasn't on the box!
A few years ago, a friend made a lasagna with a homemade sauce (made from tomato soup) and cottage cheese and ricotta. It was delish and is the recipe I've made religiously since then. I'll share it sometime.
But, I love to cook and especially love to cook pasta dishes. It seems pretty lame that I don't have my own lasagna recipe. And, that's how I came to this particular choice.
"Lasagna with Turkey Sausage"
in Barefoot Contessa Family Style
by Ina Garten
Serves 8
2 Tbsp olive oil
1 C chopped yellow onion
2 garlic cloves, minced
1 1/2 lb sweet Italian turkey sausage, casings removed
1 28-oz can crushed tomatoes in tomato puree
1 6-oz can tomato paste
4 tsp dried flat-leaf parsley, divided
4 tsp dried basil leaves
Salt
Black pepper
1/2 lb lasagna noodles
15 oz ricotta cheese
3 to 4 oz creamy goat cheese, crumbled
1 C grated Parmesan, plus 1/4 C for sprinkling
1 egg, lightly beaten
1 lb fresh mozzarella, shredded
Preheat the over to 400 F.
Heat olive oil in a large skillet. Add the onion and cook for 5 minutes over medium-low heat, until translucent. Add the garlic and cook for one more minute. Add the sausage and cook over medium-low heat, breaking it up with a fork, for 8 to 10 minutes, or until no longer pink.
Add the tomatoes, tomato paste, 2 Tbsp of parsley, the basil, 1 tsp salt, and 1/2 tsp pepper. Simmer, uncovered, over medium-low heat, for 15 to 20 minutes or until thickened.
Meanwhile, fill a large bowl with the hottest tap water. Add the noodles and allow them to sit in the water for 20 minutes. Drain. Note. I used whole wheat noodles and actually soaked them for more like 40 minutes, replacing the water with fresh hot water about half-way through. It worked great!
In a medium bowl, combine the ricotta, goat cheese, 1 C Parmesan, egg, 2 tsp parsley, 1/2 tsp salt, and 1/4 tsp pepper. Set aside.
Ladle 1/3 of the sauce into a 9 x 12 x 2-inch rectangular baking dish, spreading the sauce over the bottom of the dish. Then add the layers as follows: half the pasta, half the mozzarella, half the ricotta, and one third of the sauce. Add the rest of the pasta, mozzarella, ricotta, and finally, sauce. Sprinkle with 1/4 C of Parmesan cheese. Bake for 30 minutes, or until the sauce is bubbling.
To make ahead, refrigerate the assembled, unbaked lasagna, Bake for 30 to 40 minutes or until bubbly.
My review.
I was a little nervous about not cooking the noodles, but that part turned out really well.
I was also a little nervous about the amount of noodles. I'm used to lots of layers of noodles, and this recipe only has two layers. That worked out okay, too.
I didn't listen to Ina and used spicy sausage instead of sweet. The sausage part was okay but not great. Maybe I need to try it with a different brand of sausage. I used Jennie-O turkey sausage (all my grocery store had). I also think I could leave the sausage out.
I was surprised by how solid the lasagna was. When I scooped it out it actually stayed as a real piece (instead of falling apart in a soupy mess like my "normal" recipe). The cheese formed a really nice layer; I think that was due to the egg and the goat cheese. The sauce mixture wasn't the perfect consistency.
I don't think this will replace the lasagna recipe I normally make, but I think we will switch it up with this recipe every now and then. I'll use a different kind of sausage, though.
Saturday, November 28, 2009
Week 13: Cornbread Dressing with Sausage and Fall Apples
I had big plans to test-drive several different stuffing recipes in the first weeks of November and pick the perfect one to take to Thanksgiving.
It didn't exactly turn out that way.
I made one recipe; it was good. And, I decided to make a different recipe (the one listed below) the night before Thanksgiving to take to dinner. Risky, I know, but it came highly recommended.
Cornbread Dressing with Turkey Sausage and Fall Apples
From Oprah.com (recommended by my sister-in-law)
Makes 10 to 12 servings
3 Tbsp vegetable oil
12 oz ground turkey sausage
3 medium onions, chopped
2 C chopped celery
3 large Granny Smith apples, peeled and diced
9 C crumbled buttermilk cornbread (see recipe below)
2 C fresh sourdough bread cubes
2 tsp poultry seasoning
1 tsp fresh thyme
2 tsp fresh sage
1 tsp salt
Pepper to taste
3 C chicken broth
Warm 1 Tbsp oil in a large skillet over medium-high heat. Add sausage, crumble, and cook completely.
Add remaining 2 Tbsp oil to same skillet. Add onion, celery, and apples (with sausage). Saute until tender. Set mixture aside.
Preheat oven to 300 degrees. Crumble cornbread. Cut sourdough into 1-inch cubes. Place on large baking sheet. Bake 15 - 20 minutes (stirring every five minutes) or until golden and crunchy.
Note: The cornbread gets really crumbly; it doesn't hold its shape very well. Don't be surprised.
Raise oven temperature to 350 degrees.
Add bread to sausage, onion, celery, and apple mixture.
Butter a 9" x 13" x 3" pan plus a 9" x 9" baking dish. Divide dressing between dishes. Drizzle half of broth over dressing. Bake 30 minutes; remove from oven and drizzle remaining broth over dressing. Bake additional 20 to 30 minutes, or until dressing is browned on top but still moist in the center.
I broke this last step up in to two steps. I drizzled with half the broth and baked for 30 minutes. Then, I took it out of the oven and packaged it up for transport to dinner. Once there, I added remaining half of broth and baked for 20 minutes at 350. It worked out perfectly because the stuffing baked for just as long as turkey needed to cool.
Buttermilk Cornbread
** I made the cornbread the night before the stuffing. **
1 1/2 Tbsp vegetable oil
1 C flour
2 C yellow cornmeal
1 1/2 tsp baking powder
1 1/2 tsp baking soda
1 tsp salt
2 C buttermilk
2 eggs, beaten
4 Tbsp butter, melted
Preheat oven to 400 degrees. Grease bottom and sides of 9-inch iron skillet with oil. Allow skillet to heat while you prepare batter.
Sift together flour, cornmeal, baking powder, baking soda, and salt in large bowl. In a separate bowl, whisk buttermilk, eggs, and melted butter.
Add buttermilk mixture to dry ingredients and stir together until just blended.
Using oven mitts, remove hot skillet. Pour in batter. Bake for 25 minutes.
The verdict. . . this had a lot of flavor and was relatively easy to make. The recipe definitely made enough servings to fill up some seriously hungry dinner guests. I think I liked this one better than the Sourdough Stuffing with Sausage, Apples, and Golden Raisins. The cornbread really added some great flavor and texture.
Sunday, November 15, 2009
Week 12: Hamburger Helper Stroganoff
My mom is a great cook. We never ate Hamburger Helper growing up (unless we were at a friend's house where it happened to be served).
But, when I went to college Hamburger Helper somehow found its way into my meal rotation. I had a little love affair with the stroganoff variety (the one with noodles); it is, in fact, the only variety I like. I used to make it on the counter top of my college apartment in an electric skillet.
I'm not sure if I was feeling nostalgic or what, but I found myself with a serious Hamburger Helper craving while making this week's grocery list. I couldn't bring myself to just buy the box of Hamburger Helper, so I opted for this recipe instead.
There were a surprising amount of Hamburger Helper-esque recipes online. I even found out that Hamburger Helper recently changed their stroganoff recipe, so if I had bought a box there is a good chance I would have been disappointed. In the end I decided on the recipe below because it didn't have any bouillon cubes in it; bouillon cubes freak me out - too much salt.
Beef Stroganoff Hamburger Helper
(I'm totally embarrassed to say that I found this on a message board somewhere and didn't save the original link. I feel horrible that I can't give credit where credit is due.)
1 lb lean ground beef
1 can cream of mushroom soup (condensed)
1 C + 1 soup can water
1 envelope Lipton dry onion soup mix
1 1/2 cups raw egg noodles
1 can sliced mushrooms, drained
1 Tbsp. ketchup
1/2 cup sour cream
1 cheese slice
Brown and drain the beef in a large pot.
Add everything to pot with beef, except sour cream and cheese. Simmer for 10-15 minutes stirring occasionally or until noodles are tender. I used whole wheat egg noodles. They cooked up great with the amount of liquid listed above.
Stir in sour cream and cheese slice. (I used a Kraft Single slice. Totally gross, I know, but it did the trick.) Serve.
I loved this! It was super, super easy and tasted great. Plus, the left-overs were a great lunch the next day. I'll definitely make it again.
Sunday, November 8, 2009
Week 12: Sourdough Stuffing with Sausage, Apples, and Golden Raisins
Confession. I love to eat stuffing but have never made stuffing.
Okay, so that's not entirely true. The only stuffing I've made is trusty, ol' Stove Top.
But, this year one of my Thanksgiving contributions is. . . you guessed it. . . the stuffing, and I cannot bring myself to show up with a box of Stove Top. Thus, the hunt for the perfect stuffing recipe began.
Here's what I know about my stuffing preferences.
1. I prefer stuffing with meat in it
2. Adding the guts that come in the plastic bag in the turkey freaks me out
3. I don't like nuts in my stuffing
My search for the perfect recipe began at Food Network where I found a recipes from my favorite celebrity chefs:
Ina Garten
Giada De Laurentiis
Next step was an email to friends requesting recipes. Much to my delight, at least one friend confessed to never having tried anything but Stove Top, too! The email resulted in a vote for The Pioneer Woman's stuffing recipe, a top secret family recipe, and cookbook favorite.
I narrowed the search down to three and made a commitment to try all three before Thanksgiving. Stay tuned for the results.
Um, yeah. So, I did make a commitment to actually try three kinds of stuffing. But, T-day is now about a week away. I am going to be in Philadelphia instead of the comfort of my own kitchen for five of the days between now and then. The chances of me actually making three different stuffing recipes are slim - unless I eat nothing but stuffing on the days I'm home between now and Thanksgiving. And, I'm afraid if I do that I won't want to eat stuffing on Thanksgiving.
Sourdough Stuffing with Sausage, Apples, and Golden Raisins
from Bon Appetit - November 2009 (page 111)
Makes 16 servings
Preparation for about 45 minutes
Bakes for 45 minutes to 1 hour
Stands for 10 to 15 minutes
1 1 1/2-lb loaf sourdough bread
2 lbs bulk pork breakfast sausage
2 large onions, chopped (about 4 generous C)
2 C chopped celery (about 5 stalks)
4 Tbsp (1/2 stick) butter, divided
6 C 1/2-inch cubed, peeled Granny Smith apples (about 28 oz)
3/4 C golden raisins (about 4 oz)
2 tsp ground sage
2 1/2 C low-salt chicken broth
3 large eggs
1. Position rack in center of oven and preheat to 350 degrees F. Remove crusts from bread and cut into 1/2-inch cubes (about 13 cups). Spread bread cubes in single layer on large rimmed baking sheet. Bake until pale golden, stirring occassionally, 15 to 20 minutes. Transfer bread to very large bowl.
2. Saute sausage in heavy large skillet over medium-high heat until cooked through, breaking up into small pieces with back of fork, 8 to 10 minutes. Using slotted spoon, transfer sausage to bowl with bread cubes.
3. Add onions and celery to drippings in skillet; saute golden brown, about 12 minutes. Transfer to bowl with bread-sausage mixture (do not clean skillet).
4. Melt 2 Tbsp butter in same skillet over medium-high heat. Add apples; saute until tender, about 10 minutes. Add to bowl with bread mixture; mix in raisins.
5. Melt remaining 2 Tbsp butter in same skillet over low heat. Add 2 tsp sage; stir 30 seconds. Add sage butter to bowl with bread-sauage mixture; toss to blend. Season stuffing with salt and freshly ground black pepper.
Can do all of this one day ahead. Cover and chill.
6. Position rack in center of oven and preheat to 350 degrees F. Generously butter 15 x 10 x 2-inch glass baking dish.
7. Whisk broth and eggs in medium bowl; add to stuffing and toss to mix.
8. Transfer to prepared baking dish. Bake stuffing uncovered until top is golden and crisp in spots, 45 minutes to 1 hour. Let stand 10 to 15 minutes and serve.
Week 11: Spaghetti Puttanesca
I never knew I liked puttanesca. The capers and the anchovies totally kept me from ever trying it. But, when it appeared as a special on the menu of one of our favorite restaurants (without anchovies listed as an ingredient) a big glass of Shiraz gave me enough courage to try it.
And, two days later I made my very own version in the comfort of my own kitchen - capers and anchovy (paste) included.
And, the next day I had the leftovers for lunch.
And, two more days later I made it again.
And, the next day I had the leftovers for lunch.
I think I may have developed a bit of an obsession.
It was quick and super-flavorful and a great excuse to pay a visit to my favorite Italian deli. We will definitely enjoy this again and again and again.
Spaghetti Puttanesca
Serves 2 (generous servings)
Adapted from:
Cooks Illustrated
Smitten Kitchen
last weekend's special at Wild Truffle
8 oz regular spaghetti
1 Tbsp extra-virgin olive oil
2 cloves garlic, minced
6 tsp dried flat-leaf parsley
1/3 cup pitted chopped Kalamata olives
1/2 lb Calabrese, thinly sliced
2 Tbsp capers, rinsed
1 tsp anchovy paste
1 tsp dried oregano
1/8 tsp crushed red pepper flakes
1 (14 oz) can diced tomatoes and juice
1 (8 oz) can tomato sauce
1/4 C grated Parmesan
Notes about the ingredients - You could definitely substitute whole wheat spaghetti or even another shape of noodles (like penne). I think you could also substitute pepperoni (or turkey pepperoni if you want it really healthy) in place of the Calabrese. The anchovy paste was super easy to work with and didn't produce anything that resembled a fishy taste.
Bring a large pot of salted water to a boil, add pasta and cook according to the directions on the package.
While the pasta is cooking, heat the oil in a large skillet over a medium flame. Add the garlic and saute until fragrant, about 1 minute. Add the parsley, olives, Calabrese, capers, anchovy paste, oregano and crushed red pepper to the skillet, and saute for 2 minutes more. Add the tomatoes and simmer for about 5 minutes.
When the pasta is done, drain it and add it to the skillet, tossing it with the sauce to combine. Top with grated cheese.
Thursday, November 5, 2009
Week 10: Green Bean Casserole
Not quite sure what inspired this choice, especially since fresh green beans are definitely out of season in Wisconsin right now. I think I just wanted something really warm and home-y tasting since it is doing nothing but raining here.
Adapted from:
Best Ever Green Bean Casserole
Alton Brown for Food Network
Makes 4 to 6 servings
Take about 45 minutes to make and cook
For the topping:
2 medium onions, thinly sliced
1/4 cup all-purpose flour
2 tablespoons panko bread crumbs
1 teaspoon kosher salt
Nonstick cooking spray
For beans and sauce:
2 Tbsp plus 1 tsp kosher salt, divided
1 lb fresh green beans, rinsed, trimmed and halved
2 Tbsp unsalted butter
12 oz mushrooms, trimmed and cut into 1/2-inch pieces
1/2 tsp freshly ground black pepper
2 cloves garlic, minced
1/4 tsp freshly ground nutmeg
2 Tbsp all-purpose flour
1 C chicken broth
1 C half-and-half
Preheat the oven to 475 degrees F.
Combine the onions, flour, panko and salt in a large mixing bowl and toss to combine. Coat a sheet pan with nonstick cooking spray and evenly spread the onions on the pan. Place the pan on the middle rack of the oven and bake until golden brown, approximately 30 minutes. Toss the onions 2 to 3 times during cooking. Really. Do toss the onions. Not tossing the onions results in seriously burnt onions. Once done, remove from the oven and set aside until ready to use.
Turn the oven down to 400 degrees F.
While the onions are cooking, prepare the beans. Bring a gallon of water and 2 tablespoons of salt to a boil in an 8-quart saucepan. Add the beans and blanch for 5 minutes. I actually blanched for 10 minutes. I wanted to beans to taste sort of soggy in the casserole. Drain in a colander and immediately plunge the beans into a large bowl of ice water to stop the cooking. Drain and set aside.
Melt the butter in a skillet set over medium-high heat. Add the mushrooms, 1 teaspoon salt and pepper and cook, stirring occasionally, until the mushrooms begin to give up some of their liquid, approximately 4 to 5 minutes. Add the garlic and nutmeg and continue to cook for another 1 to 2 minutes. Sprinkle the flour over the mixture and stir to combine. Cook for 1 minute. Add the broth and simmer for 1 minute. Decrease the heat to medium-low and add the half-and-half. Cook until the mixture thickens, stirring occasionally, approximately 6 to 8 minutes.
Remove from the heat and stir in 1/4 of the onions and all of the green beans. Put in casserole dish. Top with the remaining onions. Place into the oven and bake until bubbly, approximately 15 minutes. Remove and serve immediately.
Will definitely make this again. I think next time I might skip making the onions myself though and just buy some French Fried Onions. That part took a ton of time, smoked up the house, and didn't really turn out all that great.
Friday, October 30, 2009
Week 9: Spooky Cooking
My favorite kitchen helper came for a visit and some spooky cooking. We tackled two Halloween recipes.
Candy Corn Kiss Cookies
from Tasty Kitchen
1 1/2 C Flour
1 tsp Baking Soda
1/2 tsp Salt
1/3 C Butter (about 5 1/2 Tbsp), Softened
1/2 C Creamy Peanut butter
3/4 C Brown Sugar
1 Egg
1 tsp Vanilla Extract
1/8 tsp Cardamom
Granulated Sugar, For Rolling In
10 oz bag Of Hershey's Candy Corn Kisses
Preheat the oven to 375 degrees and prepare two baking sheets with parchment paper.
In a medium bowl, mix together the flour, baking soda, and salt.
In a large bowl, cream the butter and sugar together. Beat in the peanut butter and then the egg and vanilla.
Add in the dry ingredients half at at a time, mixing until well-combined.
Roll the dough into balls about 1″ thick. Roll them in the granulated sugar.
Bake the cookies for about 10 minutes, and then let cool. Top each cookie with a Hershey Candy Corn Kiss! When the recipe says "then let cool," it really does mean let cool. If you put the Kisses in before the cookies are cool enough they will melt. But, be careful because if you put the Kisses in when the cookies are too cool the kisses won't stick.
Pumpkin Pie Bites
from Bakerella
Be sure to check out the recipe on Bakerella. Her little pies are much cuter than mine!
Makes 24
2 refrigerated ready-to roll pie crusts
8 oz. cream cheese, room temperature
1/2 C sugar
1 C canned pumpkin
3 eggs
1 tsp vanilla
1 tsp pumpkin pie spice
Pumpkin-shaped cookie cutter
Optional
1/2 cup chocolate morsels
vegetable oil
re-sealable plastic bags
Preheat oven to 350 degrees.
Use cookie cutter to cut 12 pumpkin shapes from each pie crust. You will need to roll the dough thinner than it comes out of the box and will need to roll and re-roll and roll and re-roll the scraps to get 12 out of each crust.
Press dough shapes into a 24 cup mini muffin tray. (Make 12 at a time, alternating cups to make sure pie crusts don’t overlap each other.)
Apply egg whites from one egg to the top edges of each pie. I forgot this step.
Mix cream cheese, sugar, canned pumpkin, remaining 2 eggs, vanilla and pumpkin pie spice together until thoroughly combined.
Spoon mixture into each pumpkin-shaped pie crust.
Bake for 12-15 minutes.
Remove pies to cool and repeat with second pie crust. Place the muffin tray in the freezer to cool it quickly for re-use.
Makes 24 pies. Keep refrigerated.
To decorate, melt chocolate in a heat-proof bowl in the microwave on medium. Heat in 30 second intervals, stirring in between until melted. Add a little vegetable oil to make the chocolate more fluid. Transfer to a re-sealable plastic bag and cut the corner off. Drizzle or draw faces on pies. Natalie got really impatient, so we didn't make it to the decorating stage. We just covered the little pie with whipped cream and enjoyed.
Happy Halloween, everyone. My favorite part of Halloween is that once it's over Thanksgiving preparations can begin! I love Thanksgiving - definitely my favorite holiday.
Monday, October 26, 2009
Week 9: Butternut Squash Risotto with Shrimp
I have never cooked or eaten (at least not since I survived on baby food) squash. Hiding it in risotto - with plenty of butter and wine and cheese - seemed like the best way to eat a sort-of suspect vegetable.
And, thus my contribution to Kitchen Challenge 2: Squash It was born.
There are lots of ingredients (which I know intimidates Greta) and a vegetable that isn't corn, peas, or green benas (which makes Denise nervous) and shrimp (which makes the dish non-Em friendly), but read on because it was actually pretty great.
Butternut Squash Risotto with Shrimp
Adapted from:
Bon Appetit, November 2009, p. 62
Cook's Illustrated: Italian Favorites, 2009, p. 46-47
Serves 4 as a main course (6 as a side dish)
Prep time: 50 - 60 minutes
4 oz pancetta, chopped
1 lb large, uncooked, deveined, peeled shrimp
3 Tbsp olive oil, divided
1 medium, butternut squash (about 2 lbs), peeled, seeded (fibers and seeds reserved), and cut into 1/2" cubes (about 3 1/2 C)
3/4 tsp salt, divided
3/4 tsp ground black pepper, divided
4 C low sodium broth (chicken or vegetable)
1 C water
4 Tbsp unsalted butter
1 onion, chopped (about 1 C)
2 medium garlic cloves, minced (about 2 tsp)
1 1/3 C Arborio rice
1 1/3 C dry white wine, room temperature
1 1/2 oz finely grated Parmesan cheese (about 3/4 C)
1/4 C whipping cream, room temperature
1 tsp dried, ground sage
1/4 tsp nutmeg
1. Get the squash ready. (This was the scariest step for me, but it wasn't really that bad.) Peel it with a vegetable peeler. Cut off the top (about 1") and bottom (about 1"). Cut the squash at its "bulbous point" - the part where it goes from being round to being more stem-like. Cut bulb in half and remove seeds with spoon. (Reserve seeds and goop.) Cut each piece of the bulb into 1/2" halfmoons, then into 1/2" cubes. Stand on neck end and slice into 1/2" planks. Cut planks into 1/2" strips, then into 1/2" cubes.
2. Heat 1 Tbsp oil in large, heavy skillet over medium-high heat. Add pancetta and saute until fat renders and brown and almost crisp. Using slotted spoon, transfer to medium bowl. Sprinkle shrimp with salt and pepper (1/8" tsp each). Saute until browned and just opaque in center, about 3 minutes. Add to bowl with pancetta.
3. Add 2 Tbsp oil to skillet. Heat until shimmering but not smoking. Add 3 1/2 C squash in even layer and cook without stirring until golden brown, 4 to 5 minutes; stir in 1/4 tsp salt and 1/4 tsp pepper. Continue to cook, stirring occasionally, until squash is tender and browned, about 5 minutes longer. Transfer squash to bowl and set aside.
4. Keep skillet over medium heat; add reserved squash fibers and seeds and any leftover diced squash. Cook, stirring frequently (and, frequently means pretty much constantly) to break up fibers, until lightly browned, about 4 minutes. Transfer to large saucepan and add chicken broth and water; cover saucepan and bring mixture to simmer over high heat, then reduce heat to medium-low to maintain bare simmer. This step really, really freaked me out. It all turned out okay, though, and the broth turned a really great orange color.
5. Melt 3 Tbsp butter in now-empty skillet over medium heat; when foaming subsides, add onions, garlic, 1/4 tsp salt, and 1/4 tsp pepper. Cook, stirring occasionally, until onions are softened, 4 to 5 minutes. Add rice to skillet and cook, stirring frequently, until grains are translucent around edges, about 3 minutes. Add wine and cook, stirring frequently, until fully absorbed, 4 to 5 minutes.
6. Meanwhile, strain hot broth through fine-mesh strainer set over medium bowl, pressing on solids to extract as much liquid as possible. Return strained broth to saucepan and discard solids in strainer; cover saucepan and set over low heat to keep broth hot.
7. When wine is fully absorbed, add 3 C hot broth and half of reserved squash to rice. Simmer, stirring every 3 to 4 minutes, until liquid is absorbed, about 12 minutes.
8. Stir in about 1/2 C hot broth and cook, stirring constantly, until absorbed, about 3 minutes; repeat with additional broth 2 or 3 more times, until rice is al dente.
9. Off heat, stir in remaining 1 Tbsp butter, Parmesan, whipping cream, sage, and nutmeg; stir in shrimp and bacon mixture. Gently fold in remaining cooked squash.
Thursday, October 22, 2009
Week 8: Bourbon Pumpkin Pecan Bread
Bourbon Pumpkin Pecan Bread
Posted on Tasty Kitchen
Makes: 2 loaves
Prep: 10 minutes
Baking: 70 minutes
1 C Brown Sugar
1 C Sugar
4 Eggs
2/3 C Vegetable Oil
1 can Pumpkin Puree (15 Oz.)
1 3/4 C Flour, white "regular" flour
1 3/4 C Flour, whole-wheat
1 Cup Buttermilk
1/3 C Bourbon (Jim Beam)
2 tsp Baking Soda
1 1/2 tsp Salt
1 tsp Baking Powder
1 1/2 tsp Cinnamon
1 tsp Nutmeg
1/2 tsp Allspice
1/2 tsp Cloves
1/4 tsp Ground Ginger
1 1/2 C Chopped Pecans
Mix the first five ingredients in a large bowl. Add half of the flour, stir until just mixed. Mix in the buttermilk and bourbon. Mix in the remaining flour, soda, salt, baking powder and spices. Fold in the pecans.
Pour into two greased 9 x 5 loaf pans. Bake at 350 degrees for 1 hour 10 minutes, or until a tester comes out clean. (Check at 1 hour.)
I used parchment paper instead of greasing the loaf pans. I also decided to add half a bag of mini chocolate chips I found in the cupboard while digging for the pecans. They were a nice touch. I'll definitely make this again.
Tuesday, October 20, 2009
Kitchen Challenge 2: Squash it
These fall lovelies caught my eye at the Farmers Market a few weekends ago and inspired the second kitchen challenge.
In honor of fall, I'd like to pose a challenge to you, our readers. (We have at least a few readers out there, right?)
Cook something with squash in it - real squash (not frozen or canned).
Sometime between now and November 22 (Sunday). . .
Option 1: Blog about it
Cook a new squash item. Take a picture of the squash creation. Create a post on your own blog that includes the recipe and the picture. Add a comment on this post linking us back to your creation.
Option 2: Email us about it
Cook something new with squash. Take a picture of it. Email the picture and the recipe to CookEatRepeatChallenge@gmail.com
I'll randomly draw a name from those who participate and send some kitchen-related mail love to a lucky reader.
And, we'll all learn lots of great new ways to use squash.
Week 8: Herb-Roasted Lamb
Brad has a thing for lamb. I have a thing for Brad. So, I called up the butcher, ordered a lamb, and whipped some up for dinner.
I chose this recipe because it had a great picture in the cookbook and also because it had lots of garlic and butter. You can't go wrong with garlic and butter.
Adapted from:
Herb-Roasted Lamb
in Barefoot Contessa Family Style by Ina Garten
p. 74
12 large, unpeeled garlic cloves, divided
1 Tbsp. chopped fresh rosemary leaves
Salt
Freshly ground black pepper
2 Tbsp. unsalted butter, melted
1 6-pound boneless leg of lamb, trimmed and tied
4 to 5 pounds small unpeeled potatoes (16 to 20 potatoes)
2 Tbsp. olive oil
Preheat the oven to 450 degrees. Place the oven rack in the lower third of the oven so the lamb will sit in the middle of the oven.
Peel 6 of the cloves of garlic and place them in the bowl of a food processor fitted with the steel blade. Add the rosemary, 1 Tbsp. salt, 1 tsp. pepper, and butter. Process until the garlic and rosemary are finely minced. Thoroughly coat the top and sides of the lamb with the rosemary mixture. Allow to sit at room temperature for 30 minutes to an hour.
Toss the potatoes and remaining unpeeled garlic in a bowl with the olive oil and sprinkle with salt. Place in the bottom of a large roasting pan. Place the lamb on top of the potatoes and rost for 1 1/4 to 1 1/2 hours, or until the internal temperature of the lamb is 135 degrees (rare) or 145 degrees (medium). Remove from the oven and put the lamb on a platter; cover tightly with aluminum foil. Allow the lamb to rest for about 20 minutes. Slice and serve with the potatoes.
I have to admit that my shiny new meat thermometer let me down. I must have put it too far into the meat or too near the center or something. The part immediately where the probe was turned out exactly medium rare at 145 degrees. The rest of the lamb was not anywhere near medium rare. It was more like well done.